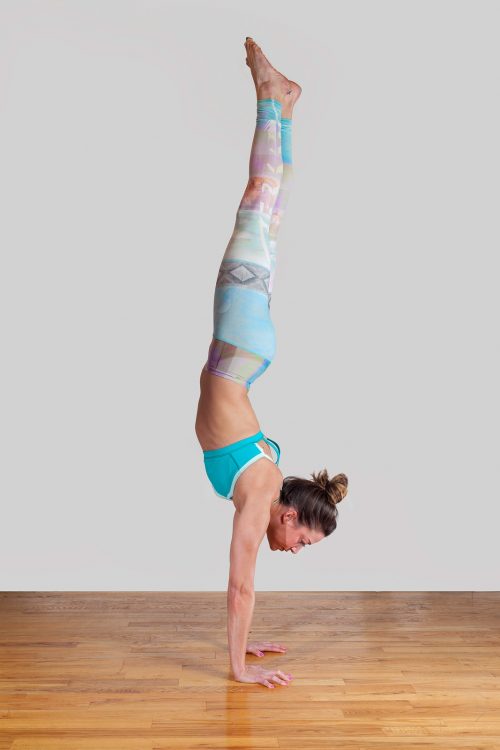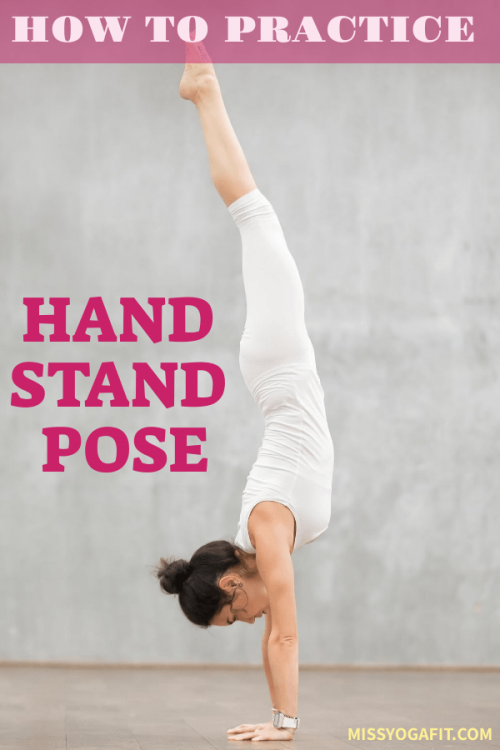
The handstand pose is easy if you know how to do the Mountain Pose. You are just going to turn that pose upside down.
POSE INFORMATION
GENERAL INFO
Name in Sanskrit: Adho Mukha Vrsksasana
Difficulty: Hard
POSE BENEFITS
- The pose makes the arms, shoulders and wrists stronger.
- It elongates the belly.
- It relaxes the brain, causing the stress levels to drop and prevents depression.
- It increases the performer’s sense of balance.
POSE CAUTIONS
The following individuals should be cautious when doing this pose:
- People with high blood pressure.
- Students with any of neck, back or shoulder injury.
- Menstruating women with experience in this pose can proceed until they get pregnant.
- This pose is not recommended for pregnant women.

HOW TO PRACTICE THIS ASANA
ONE
Start with the Downward-Facing Dog Pose (Adho Mukha Svanasana). The tips of your fingers will be about two inches far away from the wall and the hands are shoulder-width.
This can make your shoulders tight; position your fingers a bit outward. If the shoulders aren’t too tight, proceed to make them parallel.
Balance and prepare your body in for pose by pressing your scapulas over the back of your body and downward draw them to the tailbone.
Ensure that your shoulders are kept broad by moving the upper arms out, your arms will go inward. Stretch your palms and push the base of the longest finger strongly over the floor.
TWO
Fold a knee and press the foot inward and nearer to the wall. This could be left leg; it means you will keep the right leg busy by stretching along the heel.
Try to hop as practice before you decide to lift your body upside down. Move the right leg along the wide arc near the wall and push your left foot off the floor, and kicking along the heel to align the left knee.
When the two feet are up, use the muscles of the abdominal core in lifting your hips across the shoulders.
In this position, hop many times up and down, and push higher as you hop with each time you hop. Breathe as you do this.
THREE
For beginners, this hop might be what they can do for a couple of first attempts. Improve regularly using poses that strengthen like the Adho Mukha Svanasana or the Plank Pose.
Later, this pose will get easier and you’ll go deeper. Don’t fret if your heels collide with the wall at first. Practice and it will become easier to dangle your heels towards the wall.
FOUR
Your groins and armpits are likely to be tight and the lower back curved strongly. To stretch the part, pull the front ribs towards the inside of your body.
Go for your heels to reach the tailbone, and then move the heels up on the wall.
Press the outside of your legs close and rotating the thighs inward.
Position the head around the area between the shoulder blades and look forward in the room.
FIVE
For beginners, 10 – 15 seconds in this pose is enough. Exhale deeply.
Through practice, extend the duration to a minute. Now it’s time to down, but ensure you don’t dip on the shoulders. Instead, ensure the shoulders are off the ground and they’re broad.
Set a foot down one after another while you breathe out. Return to the Uttanasana for 30 seconds to a minute.
Performers are likely to continue kicking with one leg, but it’s important to switch kicks between legs, a leg per day.
How to do Handstand Pose (Adho Mukha Vrsksasana)
BEGINNERS TIP
As a beginner, keeping the elbows straight in this pose is hard. Tie a strap of clothing and fasten it on the upper arms.
Stretch your arms to align forward before you and at the width of your shoulders. Fasten the strap to tighten it against the outer arms.
Using the strap for the pose, press the arms a bit inward, a bit away from the tightened strap. Don’t let them push out against the strap.
MODIFICATIONS & PROPS
Modifying this pose is to support the tip of your head over a cushioned brace which is placed in the floor within the hands. This will secure the position and boost the confidence of the performer.
Another challenge is getting the height right. When the height is too low, the head isn’t supported. When it’s too high, the neck will feel like it’s in pain.
Get a yoga block and make it your base, now fold two blankets and place it over the block. This height of this support will be dependent on the height and the length of the performer’s arms.
If you are still confused about the height, try different height and see which one is the most convenient.
Now place your hands on each side of this support. Start with the Adho Mukha Svanasana. Continue until you can support the tip on this brace and till the back of the head is on the wall.
Now go back to the previous steps above for going further into the pose.
DEEPEN THIS POSE
To deepen this pose, lift the head while looking at the floor. However, avoid getting bottom of the skull locked against the back of your neck.
Assume you have a ball pressed against the nape of your neck as you are lifting your head up. This imagination and the process help in controlling the curve of the cervix.
Try lifting your head up when you push the blades deeper into the back. Support the top over the wall.
Now carry a heel far from the wall and stretch as strong as you can to the ceiling. Move the same heel toward the wall again and repeat the same with the second heel.
To complete this, try carrying the two heels away from the wall while you are supported on the wall by your crown.
PARTNERING
With a partner, you can experience the position of your tailbone. The partner should stand in front.
She will fold her arms over your pelvis, tightening her grip on a wrist in the second hand and caressing the sacrum.
She will then draw up the pelvis and the tailbone will be lifted to the heels in the process.
VARIATIONS
A simple variation is to place the hands in various locations. For instance, restrict your hands to be inside the width of the shoulder.
This will reduce the bottom of the support and improve the sense of balance.
Alternatively, position your hands outside and learn how to roll up your upper arms externally in the process.
Amanda Frier, a certified Power Yoga teacher living in the dynamic city of Sydney, Australia, has embarked on an inspiring journey of dedication and empowerment through the practice of yoga.
Her story, characterized by her commitment to sharing the transformative power of Power Yoga, showcases the profound impact one can have even without the spotlight of social media influence.

