

The Warrior III pose moves further than High Lunge Pose.
POSE INFORMATION
GENERAL INFO
Name in Sanskrit: Virabhadrasana
Difficulty: Easy
POSE BENEFITS
- This pose adds strength to the legs and ankles.
- It gives strength to the shoulders and back muscles.
- It also tones the midriff.
- It enhances stability and posture.
POSE CAUTIONS
The following health issues should take cautions from the exercise:
People who suffer from hypertension or people with high blood pressure.

HOW TO PRACTICE THIS ASANA
ONE
Remain in Tadasana (Mountain Pose), breathe out and bend forward to Uttanasana. From there, breathe out and move your left foot once again into the position of high lunge.
Your right knee needs to be angled at 90 degrees. Place the center of your body – the pubis extending towards the sternum – to the middle of the right thigh starting from the knee to the wrinkle of the hip.
Then move the hands towards your right knee, right hand towards the external knee, left hand to the inward part.
Press the knee using your hands, push your body somewhat. Then breathe out and turn it a bit to one side.
TWO
Presently from this high position, extend your arms to the front, making it parallel towards the floor and to one another. Let the palm face the other palm.
Breathe out and push the top of the right thighbone back and press the heel effectively into the floor. Adjust the way the front leg straightens and how the back leg lifts up.
When you push up the back leg, try to oppose. You can simply do this by pushing the tailbone inside the pelvis.
THREE
Usually, students try Virabhadrasana III by pushing the body forward. This will in general move the body weight onto the front foot and cause the position to be unstable.
Try not to enable the body to swing to the front as you move into position; rather, as you fix the front knee, consider squeezing the top of the thighbone back.
This focuses the femur in the hip joint. The heel is then grounded into the floor, and balances the position.
FOUR
The raised leg, your arms and the body need to be situated parallel to the floor. For some people, the pelvis will in general slant.
Put down the hip of the leg you raised and toward the floor until the point that the two hip points become equal and parallel to the floor.
Invigorate the back leg and stretch it toward the wall behind you; achieve similar effect the other way with the arms.
Bring the head up somewhat and look forward, yet make sure not to contract the back of your neck.
FIVE
Remain in this position for about 30 seconds and up to a minute. Discharge back to the jump on breathing out.
Draw your hands over the floor, ensuring each is placed on a side of the foot (the right).
While breathing out, move the left foot to the front so to be in contact with the right.
Remain in the forward twist for a couple of breaths, at that point rehash for a similar time allotment on the opposite side.
How to do the Warrior III Pose (SVirabhadrasana)
BEGINNER TIPS
During the process of straightening the front knee by driving the top of the thighbone back, try to make of picture of the calf of your leg is opposing forward the shin.
These two restricting developments keep the knee from locking or extending too much and it balances the position.
MODIFICATIONS & PROPS
Adjusting in this pose might be extremely difficult for learners. Plan for the pose using a chair situated before the sticky mat you are using.
Turn the seat’s back or chair to you. As explained in the third step above, as you extend your arms forward, grab the edge of the seat.
Continue to the complete pose and press on. Slide the seat far from you and use it to keep your arms.
Endeavor to grab the seat as gentle as you can.
DEEPEN THE POSE
Experienced students can go from Virabhadrasana III to Virabhadrasana I. Do Warrior I while the arms are extended upward.
Breathe out the front body downward to the tip of the leg you put forward. Now do the Virabhadrasana III as portrayed in the third Step above.
PARTNERING
An assistant will make things easy during the pose. Let him take position before you.
After this has been achieved, bring your arms to the front before pushing into the pose completely.
The person must grasp your wrists. The person should direct you towards position.
He should not draw, and after that, brace the wrists in his hands as softly as he could be.
VARIATION
During the Virabhadrasana III changing position of the arms is possible.
Try to extend the arms to the edges of the body, similar to wings of a plane. Or try to touch them again.
The palms should be looking up, at the edges of your body.
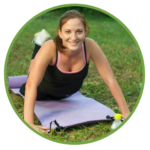
Joanne Lipston is a certified Yin Yoga teacher in United States, passionate about the transformative power of this practice. With a dedication to promoting strength, flexibility, and mindfulness, Joanne creates an energetic and supportive environment in her classes.
