If you are looking to improve your flexibility and reduce stress, the pigeon pose (Kapotasana) is an excellent yoga asana to consider. This pose is highly beneficial for the hips, thighs, and lower back, and it is relatively easy to practice with consistent effort.
How to do the Pigeon Pose (Kapotasana)
In this section, we will provide you with step-by-step instructions on how to do the pigeon pose correctly, as well as some valuable information about its origins and benefits.
Key Takeaways
- The pigeon pose is an excellent yoga asana for improving flexibility and reducing stress.
- The name of the pose in Sanskrit is Kapotasana.
- Regular practice of this asana can benefit the hips, thighs, and lower back.
- Following step-by-step instructions is essential to ensure that you perform the pose correctly.
- Beginners may need to use modifications or props to practice the pose comfortably.
Table of Contents
Understanding the Pigeon Pose
Before we begin practicing the pigeon pose, it is essential to understand the benefits and potential risks associated with this asana.
The Benefits of Pigeon Pose
The pigeon pose is a powerful hip opener that can help increase flexibility and improve posture. This asana targets the hip flexors, groin, and glutes, creating a deep stretch that can release tension and improve circulation. Practicing the pigeon pose regularly can also help alleviate back pain, reduce stress and anxiety, and promote a sense of calm and relaxation.
The Difficulty of Pigeon Pose
While the pigeon pose offers numerous benefits, it can be a challenging asana, especially for beginners. The deep stretch can be intense, and individuals with tight hips or knee injuries may experience discomfort or pain. It is crucial to listen to your body and work at a pace that is comfortable for you.
Pigeon Pose Cautions
Individuals with knee or hip injuries should avoid practicing the full expression of the pigeon pose. Instead, they can modify the asana by using props such as blocks or blankets to support their hips and knees. It is essential to move slowly and mindfully, respecting your body’s limits and avoiding any sudden or forceful movements that can lead to injury.
By understanding the benefits and risks of the pigeon pose, we can approach this asana with mindfulness and respect for our bodies. Let us now dive into the step-by-step instructions for practicing the pigeon pose.
Step-by-Step Instructions
Now that we’ve discussed the benefits and precautions, let’s dive into the step-by-step instructions for practicing the pigeon pose.
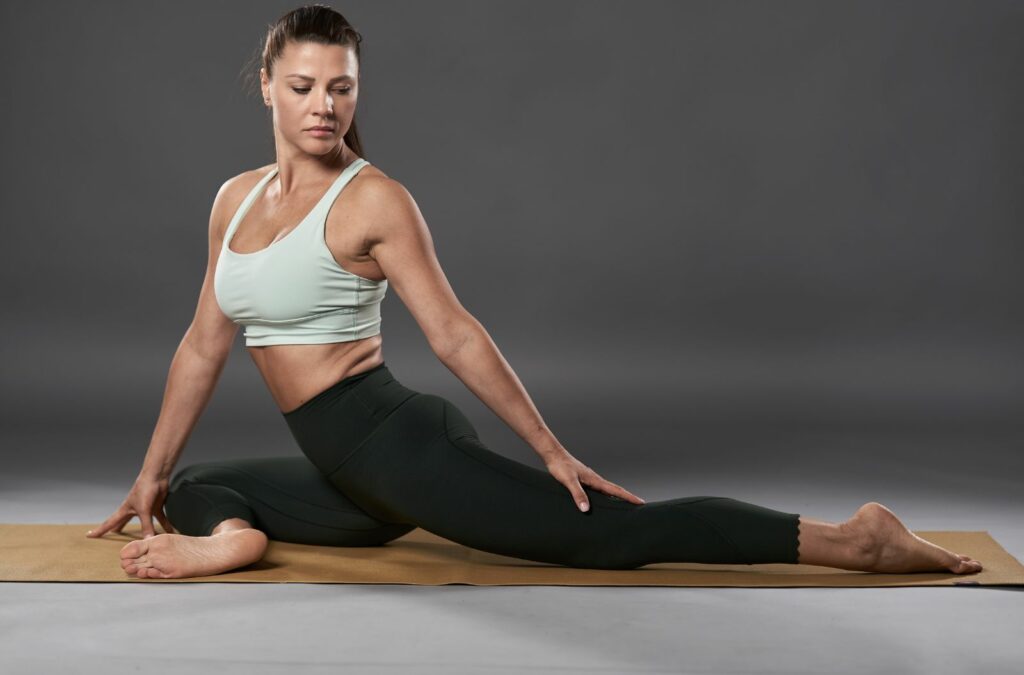
Step 1: Begin in the downward-facing dog pose, with your hands and feet on the mat and your hips lifted towards the ceiling.
Step 2: Bring your right knee to your right hand and place it on the mat, positioning your ankle near your left wrist. Your shin should be diagonal, with your toes pointing towards your left hip.
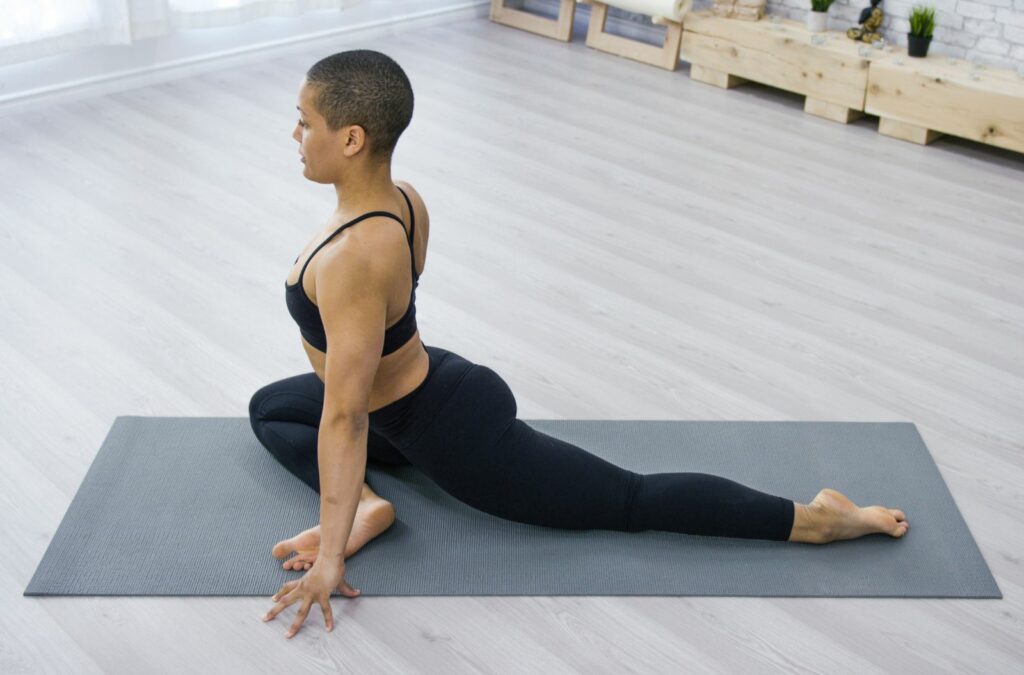
Step 3: Slide your left leg back, straightening your knee and lengthening your leg behind you. Your hips should be squared, with both sitting bones evenly grounded on the mat.
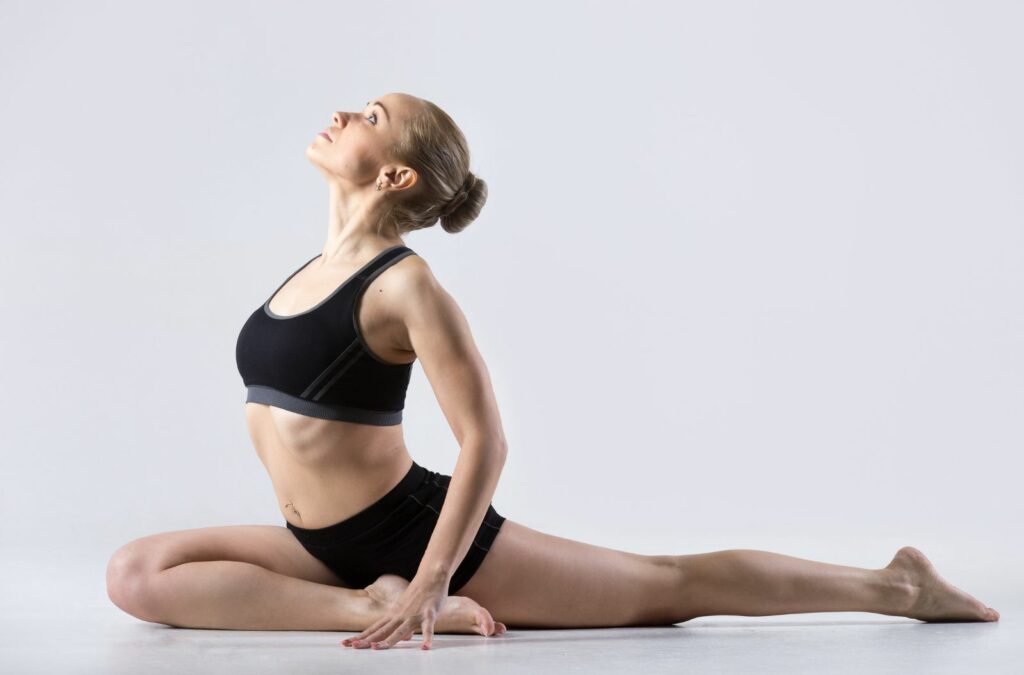
Step 4: Inhale deeply, lengthening your spine and lifting your chest towards the ceiling. As you exhale, gently walk your hands toward your front leg, slowly lowering your upper body towards the mat. If this is too intense, stay lifted and support yourself with your palms pressing into the mat.
Step 5: Hold this pose for 5-10 breaths, then slowly release and come back to the downward-facing dog pose. Repeat on the other side.
Remember to practice with mindfulness and respect for your body’s limits, focusing on your breath and making adjustments as needed.
Tips for Beginners
If you are new to practicing the pigeon pose, it can be a challenging asana. However, with time, patience, and a few tips, you can ease into this pose with confidence and gradually deepen your practice. Here are some beginner-friendly tips to get you started:
- Warm-up first: Take a few minutes to stretch and warm up your hips before trying the pigeon pose. This can be done by practicing hip-opening poses such as the butterfly pose or the seated forward bend.
- Use props: Utilizing yoga props such as blankets, bolsters, or blocks can help support your practice and make it more comfortable. For instance, placing a blanket or block under your hip can help elevate it and reduce strain during the pose.
- Take it slow: Don’t try to force yourself into the full expression of the pose right away. Start by practicing the basic variation and work your way up gradually. Listen to your body, and only go as far as feels comfortable and safe.
- Breathe deeply: Focus on your breath and try to inhale and exhale deeply while holding the pose. This can help calm your mind and reduce any tension or stress in the body.
- Practice regularly: Consistency is key when it comes to yoga practice. Try to incorporate the pigeon pose into your daily routine to improve your flexibility and experience its full benefits.
Additional Tip:
“Remember, every yogi was once a beginner. Don’t be too hard on yourself and enjoy the journey!”
By following these tips, you can create a safe and enjoyable practice of the pigeon pose, perfect for beginners. Remember that everyone’s journey is unique, and progress will come with consistent practice.
Modifications and Props
As we mentioned earlier, not everyone’s body is the same, and some individuals may require modifications or props to perform the pigeon pose comfortably. Below are some modifications and props that can be used to support your practice and make it accessible to individuals with different levels of flexibility:
Modifications:
- Use a blanket or pillow under your hips to elevate them if you have tight hips or knees.
- Place a block or pillow under your forehead for support if you can’t reach the ground with your head.
- Use a strap to hold your foot if you can’t reach it with your hand.
Props:
Props can help you achieve proper alignment in the pigeon pose, which is essential to avoid injuries or discomfort.
| Prop | Usage |
|---|---|
| Block | Place it under your hip to support your body and keep your hips level. |
| Bolster | Place it under your chest for support and to deepen the stretch in your hips. |
| Blanket | Use it to cushion your knees or hips and make the pose more comfortable. |
| Strap | Use it to hold your foot and keep your body aligned. |
Remember, modifications and props are not a sign of weakness or lack of flexibility. They are tools to help you practice safely and comfortably and gradually deepen your practice. Always listen to your body and make adjustments as needed.
Partnering in Pigeon Pose
At times, incorporating partner work into your yoga practice can add a new level of support and connection. The pigeon pose is no exception. Practicing the pigeon pose with a partner can deepen the stretch, add a new dimension to your yoga practice, and offer additional support.
Before attempting to practice the pigeon pose with a partner, it is critical to have a good understanding of proper alignment and technique when performing this asana independently. It is also essential to communicate with your partner throughout the practice to ensure safety, proper alignment, and mutual comfort.
When partnering in pigeon pose, there are various approaches you can take:
- Assisted Pigeon: In this variation, one partner gets into the pigeon pose while the other partner gently assists or guides them into a deeper stretch by applying pressure to the lower back or hips.
- Double Pigeon: In this variation, both partners perform the pigeon pose simultaneously, facing each other. This variation can help deepen the stretch and provide additional support by holding hands or interlocking arms.
- Pigeon with a Twist: In this variation, one partner gets into the pigeon pose while the other partner assists by gently pressing their shoulder into the back of the partner’s front thigh. This twist can further enhance the stretch and loosen up the lower back muscles.
- Partner Seated Pigeon: In this variation, both partners sit back to back, with one partner performing the seated pigeon pose while the other partner provides support by pushing their back against the partner’s back. This variation can provide additional support and help maintain proper alignment.
Partnering in pigeon pose can be a fun, engaging, and supportive way to deepen your yoga practice. However, it is essential to approach this variation with care and caution, especially if you are new to the pigeon pose. Start slowly, and be sure to communicate with your partner throughout the practice to ensure safety and mutual comfort.
Variations of Pigeon Pose
The pigeon pose offers many variations that can help to deepen your practice and target different areas of the body. Here are some of the most popular pigeon pose variations:
King Pigeon Pose
Kneel with your legs hip-distance apart and place your left knee forward. Bring your right leg back behind you, keeping the right hip on the ground. Place your hands on your hips and arch your back.
Reach your right hand back and grab onto your right foot, bringing it toward your right buttock. Reach your left hand up and back, pulling your elbow towards the ceiling. Hold for a few breaths and then repeat on the other side.
Sleeping Pigeon Pose
Begin in the pigeon pose position with your left leg forward. Walk your hands out in front of you and fold forward, resting your forehead on the ground. Hold for a few breaths and then repeat on the other side.
Bound Angle Pigeon Pose
Sit with your legs outstretched in front of you. Bend your knees and bring the soles of your feet together. Slide your feet away from your hips and fold forward, resting your forehead on the ground.
Try incorporating these pigeon pose variations into your yoga practice to experience the full benefits of this powerful asana. Remember to always listen to your body and modify poses as needed to avoid injury.
Conclusion
We hope this guide has been helpful in providing you with valuable information on the pigeon pose (Kapotasana). Incorporating this pose into your regular yoga practice can offer numerous benefits for your mind, body, and spirit. By following the step-by-step instructions, beginners can gradually ease into this pose with confidence and make modifications as needed.
Understanding the difficulty level of the pigeon pose and the precautions that need to be taken is crucial for ensuring safety and avoiding potential injuries. Expanding your practice with variations and props can challenge you and add a new dimension to your practice.
Jennie Malt, a certified Yin Yoga teacher residing in Canada, has been on a remarkable journey of discovery and transformation through the practice of yoga.
Her path, though not one of fame and influence, is a testament to the profound effects of dedication and the capacity of yoga to inspire and uplift.