Welcome to our comprehensive guide on mastering how to do crow pose, also known as Kakasana. In this section, we’ll introduce you to the topic and what to expect from the article.
Crow pose is an arm balance yoga pose that requires strength, balance, and focus. It is a popular pose in yoga classes and can be challenging for beginners. But don’t worry, we will guide you through each step to help you confidently add crow pose to your yoga practice.
Key Takeaways:
- Crow pose is an arm balance yoga pose that requires strength, balance, and focus
- It is a popular pose in yoga classes and can be challenging for beginners
- We will guide you through each step to help you confidently add crow pose to your yoga practice
- Practicing crow pose comes with great benefits, such as developing core and upper arm strength and improving balance and posture
- Stay tuned for tips on how to prepare your body for crow pose and common mistakes to avoid

If you’re new to yoga or looking to expand your practice, you’ve likely heard of crow pose, also known as Kakasana. This arm balance is a foundational pose in many yoga classes and requires both balance and strength to master.
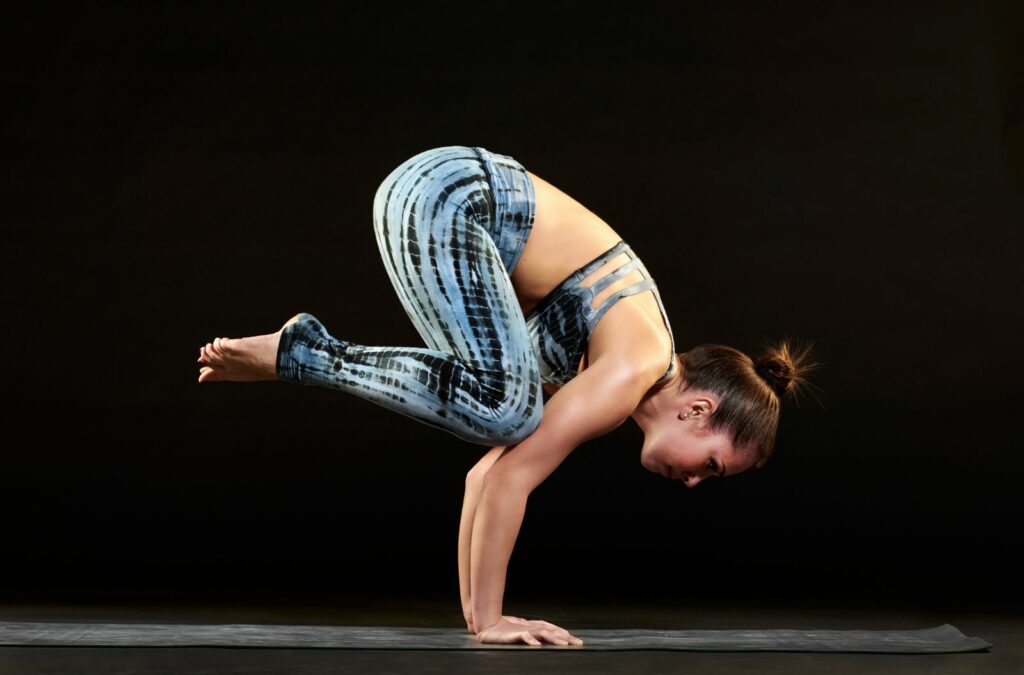
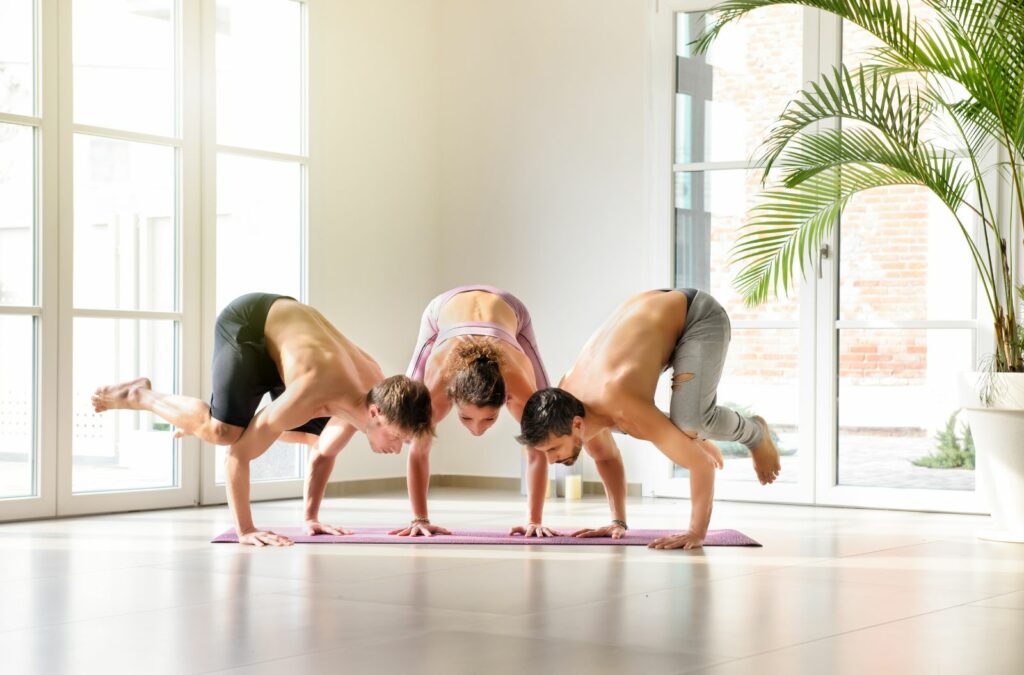
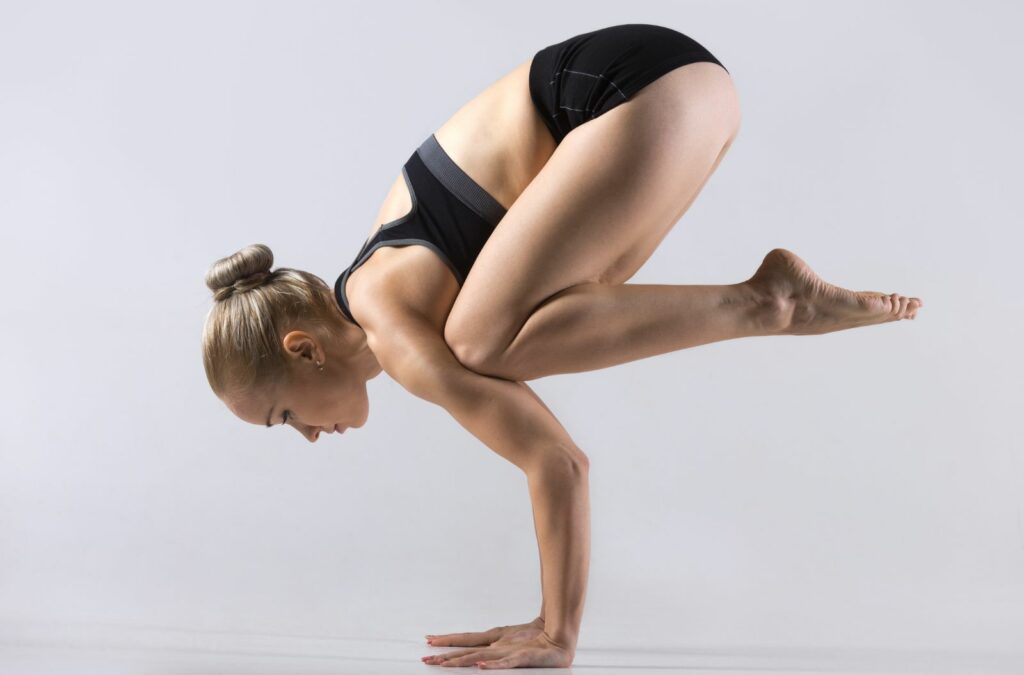
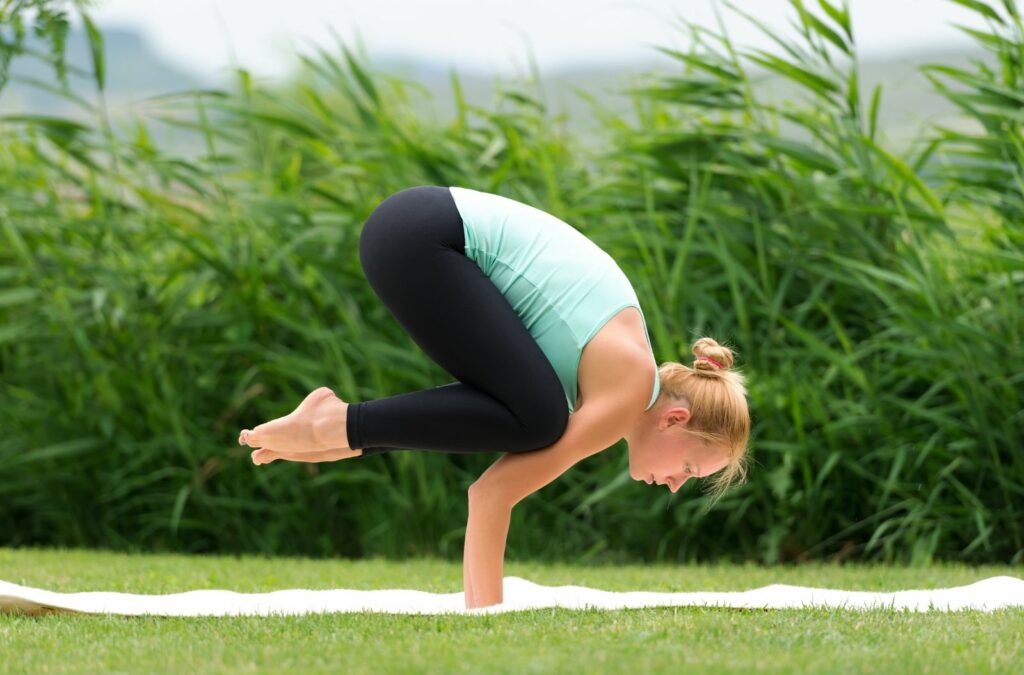
Crow pose is an asana, or yoga pose, that involves placing your hands on the ground, balancing on your arms, and bringing your knees to your upper arms. This creates a balance pose that strengthens your core, upper arms, and triceps, while also improving your overall balance and stability.
While crow pose can be challenging, it offers many benefits for both your physical and mental well-being. Practicing crow pose can improve your posture, develop your core strength, and enhance your range of motion. Additionally, it can build your confidence and inner focus, allowing you to approach challenges in your practice and life with greater ease.
Whether you’re practicing yoga in a class or at home, incorporating crow pose into your routine can help you develop balance and strength, both on and off the mat.
Throughout this article, we’ll guide you through the steps of mastering crow pose from start to finish. By following our instructions and tips, you’ll be able to confidently perform crow pose and add it to your yoga practice. Let’s dive in!
Preparing Your Body for Crow Pose
Before attempting crow pose, it’s important to prepare your body properly. This involves warming up your wrists, elbows, and shoulders, as well as engaging your core muscles. Proper preparation not only prevents injury but also helps you achieve the proper form and balance needed for the pose.
Here are some tips for preparing your body for crow pose:
| Step | Description |
|---|---|
| 1 | Start in a squatting position with your feet shoulder-width apart. |
| 2 | Place your hands flat on the floor in front of you, with your fingers spread wide and your wrists directly under your shoulders. |
| 3 | Shift your weight forward onto your hands and wrists. |
| 4 | Bring your knees up onto the back of your arms, positioning them as high up as possible to create a stable foundation. |
| 5 | Lift one foot off the ground at a time, keeping your gaze forward and your core engaged. |
It’s essential to warm up your wrists, elbows, and shoulders before getting into crow pose. This can be done with simple wrist rotations, elbow circles, and shoulder rolls. Incorporate these warm-up exercises and stretches into your routine to increase range of motion and build arm and core strength.
Here are some warm-up exercises you can do:
- Wrist rotations: Place your palms together in front of your chest and rotate your hands in a circular motion, first clockwise and then counterclockwise.
- Elbow circles: Extend your arms straight out in front of you and make circles with your elbows, first clockwise and then counterclockwise.
- Shoulder rolls: Shrug your shoulders up towards your ears, then back and down in a circular motion, first clockwise and then counterclockwise.
Incorporating these warm-up exercises and stretches into your routine will not only prepare your body for crow pose but also improve your overall strength and flexibility.
If you find this pose too difficult, you can try the crane pose that is a bit easier to train, even though is not one of the most easy asanas.
Remember, building arm and core strength is key to properly executing crow pose. By regularly incorporating exercises that target these muscle groups, such as planks and push-ups, you’ll be well on your way to mastering this challenging yoga pose.

How to do Crow Pose step by step
Now that you have warmed up and engaged your core, let’s get started with the process of getting into crow pose. Follow these steps carefully, and remember to maintain your focus and breath throughout the pose.
| Step | Description |
|---|---|
| 1 | Start in a squat position with your feet shoulder-width apart and your palms together in front of your heart. |
| 2 | Place your hands on the mat about shoulder-width apart, fingers spread wide. |
| 3 | Shift your weight forward onto your hands and lift your hips, bringing your knees to the backs of your arms, just above your elbows. |
| 4 | Bring your gaze forward, keeping your head in a neutral position. |
| 5 | Slowly lift one foot off the ground, keeping it close to your body. |
| 6 | Shift your weight onto your hands and balance on them, keeping your gaze forward. |
| 7 | Once you feel comfortable, lift your second foot off the ground and straighten your arms. |
| 8 | Hold the pose for a few breaths before gently releasing back to the squat position. |
Remember to keep your hands firmly planted on the mat, pressing into them to engage your arm and core strength. Keep your gaze forward and avoid leaning too far forward, as this can throw off your balance. If you’re having trouble lifting both feet at once, start by practicing lifting one foot at a time until you feel confident.
If you’re struggling to hold the pose, try placing a block under your head for extra support. Additionally, make sure your feet are hip-distance apart to maintain your balance and center of gravity.
While mastering crow pose can be empowering, there are common mistakes many people make that can hinder progress. By paying attention to these areas, you can improve your form and take your practice to the next level.
“Crow pose requires a delicate balance of arm and core strength, range of motion, and finding your center of gravity. When approached with proper alignment and technique, crow pose can help build confidence, strength, and balance in your yoga practice.”

Leaning Forward
A common error in crow pose is leaning too far forward, which makes it difficult to balance and places unnecessary strain on the wrists. Instead, try to keep your gaze forward and your weight evenly distributed between your hands. Focus on engaging your core and lifting through your hips to maintain balance.
Fingers Spread Wide
Another mistake is not spreading your fingers wide enough. This helps to distribute your weight evenly and provides a stable foundation. Place your hands flat on the floor in front of you with your fingers spread wide apart, pressing into the floor with your fingertips.
Lifting Your Hips
When first attempting crow pose, many people try to lift their feet off the ground without properly engaging their core and lifting their hips. To avoid falling forward, focus on lifting your hips and bringing your knees as high up your arms as possible before attempting to balance on your hands.
Straightening Your Arms
Make sure your arms are straight and strong to provide a stable base for your body. Keep your elbows bent at first as you work on building arm and core strength. When you’re ready to straighten your arms, focus on engaging your triceps and pressing into the floor with the backs of your arms.
Gaze Forward
Your gaze plays an important role in crow pose by helping to maintain your balance and focus. Keep your eyes fixed on a point in front of you rather than looking down at the ground.
Hands Flat on the Floor
For stability in crow pose, make sure your hands are flat on the floor. Avoid lifting your fingers or resting your weight on the sides of your body, which can throw off your balance and make it difficult to hold the pose.
Feet Off the Ground
Once you have shifted your weight forward and feel stable, slowly lift one foot off the ground at a time. Keep your gaze forward and keep the foot close to your body until you feel comfortable with the balance. Then, lift the other foot off the ground and balance on your hands with both feet in the air.
Knees on the Back of Your Arms
As you progress, focus on bringing your knees higher up your arms toward your armpits. This will create a more stable base, allowing you to lift your feet off the ground more easily.
Improving your crow pose requires building arm and core strength, range of motion, and finding your center of gravity. With these tips, you can avoid common mistakes and progress steadily toward a stronger and more confident crow pose practice.

If you’re new to Crow Pose or still building the required arm and core strength, don’t worry because there are ways to modify the pose. One of the best ways to start is by practicing Baby Crow Pose.
Here’s how to do it:
| Step | Description |
| 1 | Begin in a squat position with your feet hip-distance apart and your palms pressing together at your heart center. |
| 2 | Shift your weight onto your toes and place your knees on the back of your upper arms. |
| 3 | Slowly lean forward and place your head on the floor. You can use a block under your head for support.Lift your toes off the ground and bring your knees further up your arms. |
| 4 | Keep your feet at the same time.Shift your weight forward and use your hands to lift your feet off the ground, straightening your arms as much as possible. |
| 5 | Hold the pose for a few deep breaths before slowly releasing and returning to a squat position. |
By practicing Baby Crow Pose, you’ll begin to build the arm and core strength necessary for the full expression of Crow Pose.
Remember to modify as needed and never force your body into a pose that doesn’t feel comfortable. With patience and consistent practice, you’ll be able to progress towards the full expression of Crow Pose.
Strengthening Your Crow Pose and Progressing Further
Now that you have mastered the basics of crow pose, it’s time to strengthen your practice by adding variations and transitions. These movements challenge your range of motion, arm and core strength and flexibility.
One way to progress is by walking your feet towards the center of your mat, which shifts the weight forward. As you walk, engage your core and keep your hands firmly planted on the mat. Once your feet are at the same time, lift them off the ground. You can also bring your knees on the back of your arms and lift your feet.
Another way to challenge yourself is by bending your elbows and lowering your head closer to the mat. This variation requires intense strength in the upper arms and core.
Remember to always maintain proper alignment and engage your core muscles as you deepen your practice. As you progress, it’s normal to experience some setbacks, but don’t let that discourage you. With consistency and dedication, you can continue to improve your crow pose over time.
Incorporating Crow Pose into Your Yoga Routine
Now that you’ve mastered crow pose, it’s time to incorporate it into your yoga routine. Whether you’re a seasoned yogi or a beginner, crow pose can offer a challenging and rewarding addition to your practice.
As a guideline we like to include crow pose in our classes as it helps students build strength and confidence. To begin, we typically cue students to come into a low squat with their feet and knees shoulder-width apart. From there, we move into crow pose using the following steps:
- Place your hands flat on the mat about shoulder-width apart, fingers spread wide.
- Shift your weight forward until your knees come to rest on the backs of your arms, as close to the armpit as possible.
- Lift one foot off the ground, pointing your toes and keeping your gaze forward.
- With strong arms and core, lift your other foot off the ground, balancing on your hands with your feet off the floor.
- Hold the pose for a few breaths before gently releasing back to the low squat.
Remember to approach crow pose mindfully, setting a timer for your practice and focusing on your breath. If you’re not yet comfortable with the full expression of crow pose, continue to approach the pose with modifications or by holding the pose for shorter amounts of time.
For those looking to progress further, crow pose can serve as a foundation for other arm balances such as the headstand. By shifting your weight forward and engaging your core, you can begin to explore other arm balances and deepen your understanding of balance and strength.
Approach your practice with patience and a willingness to explore, and you’ll find that crow pose becomes an integral part of your yoga journey.
As you continue to practice crow pose, you may encounter certain challenges that can make it difficult to find balance and hold the pose. But with these tips, you can overcome these challenges and strengthen your practice.
The center of gravity plays a critical role in crow pose. To find balance, use your hands to shift your weight forward and keep your hands firmly planted on the mat. As you lift your feet off the ground, focus on keeping your balance on your hands and keeping your gaze forward.
Strong arms are also essential for holding the pose. Keep your hands flat on the floor, with your fingers spread wide to create a stable base. Engage your triceps and use your core strength to lift your hips and keep your body in the proper alignment. This will allow you to hold the pose for longer periods of time.
Your range of motion also affects your ability to maintain balance in crow pose. If you find it challenging to keep your feet off the ground, work on gradually building your strength and flexibility with modifications and preparatory exercises.
Another challenge you may encounter is the tendency to lean forward, which can throw off your balance. Instead, focus on keeping your weight centered and your shoulders stacked directly over your wrists. This will allow you to hold the pose with ease.
Remember to breathe deeply and stay present in the moment as you practice crow pose. Visualize yourself finding balance and holding the pose with ease. With practice and patience, you’ll be able to overcome any challenges and deepen your understanding of this foundational arm balance.
Conclusion
Now that you have learned how to do crow pose, we encourage you to continue practicing and incorporating it into your yoga routine. Remember to approach your practice with patience and mindfulness, listening to your body and respecting its limits.
As you continue to build your strength and improve your balance, don’t forget to try out different variations and transitions, challenging yourself to progress further in your practice.
Always prioritize safety and proper form, warming up your body before attempting any arm balance. If you’re feeling unsure or experiencing challenges with the pose, consider modifying or seeking guidance from a qualified yoga instructor.
We hope this comprehensive guide has given you everything you need to know to confidently practice crow pose. Incorporate it into your yoga practice and reap the benefits of increased upper body and core strength, improved balance and stability, and a sense of accomplishment. Namaste.
Benny Martica
Benny Martica, a certified Hatha Yoga teacher based in Argentina, is a dedicated and passionate advocate of yoga’s transformative power. With a deep commitment to mindfulness and holistic wellness, she empowers her students to find balance and well-being through the practice of yoga. . Her mission is to inspire others on their path to personal growth and self-discovery.

